HOWTO: TortoiseSVN with lofty.
-
Comments:
- here.
You need two items of software, TortoiseSVN and Putty. Make sure you get the Putty that has all of the extra tools, you’ll need puttygen at the very least.
Once you have installed Putty, open up the main putty.exe program. The installer put a shortcut on my desktop, yours may not have:

In the window that appears, enter lofty.infoeng.flinders.edu.au into the Host Name box:
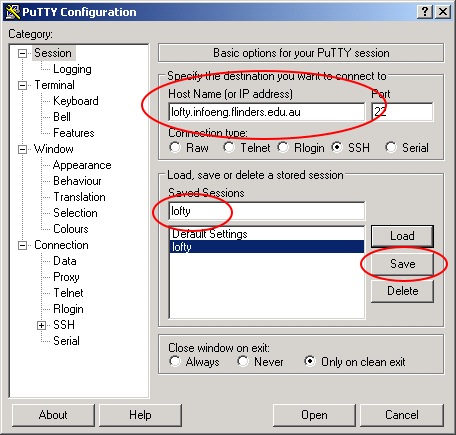
Then, enter lofty into the Saved Sessions box, and click Save. This will save you a little bit of typing later on.
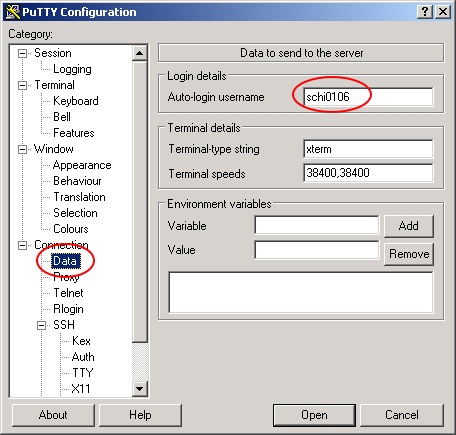
Now, select the Data item from the left tree-view (you may need to expand Connection first). Enter your Flinders CSEM/InfoEng password into the indicated box.
Click back into the Session tab, and click Save again. Now click Open.
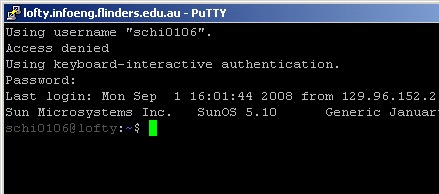
A new window will appear, which will ask you for your InfoEng password. You’ll need to enter it just this one time.
What we need to do is create a private/public key pair. One of these will live on lofty, the other on your local computer.
Before we do that, create the correct location to store this on lofty:
mkdir .ssh
Note that there is a dot before the ssh!
Now issue the command:
ssh-keygen -b 1024 -t rsa
Use the default location: ~/.ssh/id_rsa
Use an empty passphrase, and you’ll need to press enter twice. It then saves the file into this location, and creates a public key as well.
Enter the .ssh directory, and type in the following command. (Even if you already have keys in the file it copies them to, it will still be safe!):
cat id_rsa.pub >> authorized_keys
This copies the public key into the authorized_keys file, appending it to the file if it already exists.
We now need to get the private key onto your home machine. The easiest way is to type in:
cat id_rsa
and copy and paste the text into a new Text Document. Rename this to something sensible (id_rsa again is a good choice). Don’t ever let anyone else access this file, as if they do, they can get into your InfoEng account!
Now, run puttygen.exe. Click on Load, and select the file you just created in Notepad. You may need to turn on “All Files” in the file chooser. You’ll now need to save the private key. It’s a good idea to use the same filename, but with the ppk extension.
Now run another instance of putty.exe.
Click on the lofty Saved Session, and press Load. Then choose the SSH/Auth option, as shown.
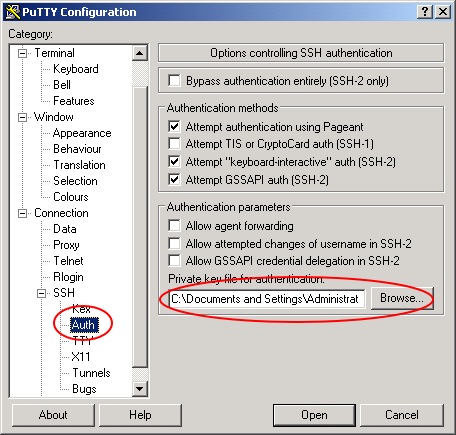
Use the Browse… button to select your keyfile. (The one with a .ppk extension, not the one you created first).
Before you click Open, go back to the Session page and click Save again. Otherwise your selection of the keyfile will not be saved next time you try to connect (but it will work this time).
Finally, click Open to test the connection. You should log in without having to enter your password.
That’s all of the Putty stuff we need to do. You can’t uninstall it, and it’s worth keeping around in case you need to SSH into the Uni machines again. When you do, it’s almost the same as opening a Command Shell on the Solaris machines, so you can do most of your work from home.
If you haven’t, install TortoiseSVN now.
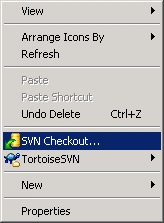
Go to the directory that you want to keep your local copy of the SVN repository in. Right-click and select SVN Checkout… from the menu.
The only things you’ll need to change are the URL, and possibly the last component of the Checkout directory. It’s currently called SVN, but you can call this last bit whatever you want.
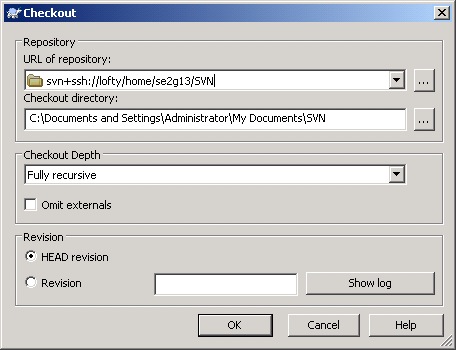
Press OK. It will, in a fairly short amount of time, get all of the data.
The contents of the directory you checked out now have Badges, showing if they are up-to-date, Modified, or so on. I’ve created a Sandbox directory for you to play around in, but the good thing about SVN and other systems is that you can’t really break anything. Someone can always revert any changes you have made if you break a file, even if you accidentally delete it. It’s obviously better if you don’t but don’t stress if you do.
![]()
You’ll want to play around to see how to add files to the repository, and commit any changes you do make. Please make sure you Commit changes regularly, and Update often too. You may find that you have to Merge changes if two of us have modified a file at around the same time - there is a program called TortoiseMerge that you can use to do this. I’d really encourage you to play around and do this (you can even checkout two versions of the repository to your hard disk and make changes to the same file in each one, and they try to commit, just to see how it works).